Getting Started with dot-prompt
Learn how to move from scattered string templates to a professional prompt engineering workflow.
1. The Problem: Strings are Messy
Most teams start with f-strings or simple templates inside their application code. While it works for simple cases, it quickly becomes hard to manage as your prompts grow.
Old Way (F-Strings)
def get_prompt(user_level, user_message):
    if user_level == "beginner":
        return f"Explain this simply: {user_message}"
    else:
return f"Explain this with technical detail: {user_message}"dot-prompt Way
init do@major: 1@version: 1.0params:@level: enum[beginner, expert] = beginner@user_message: strend initcase @level dobeginner: Explain this simply: @user_messageexpert: Explain this with technical detail: @user_messageend @level
In the old way, your logic is buried in code. In dot-prompt, your logic lives *inside* the prompt file. The compiler resolves the branching before the LLM ever sees it.
2. Setting Up Your Environment
The easiest way to use dot-prompt during development is through our Docker container, which includes a Dev UI (Viewer) and an HTTP API.
docker-compose.yml
services:
  dotprompt:
    image: dotprompt/server
    ports:
      - "4040:4040"
      - "4041:4041"
    volumes:
- ./prompts:./promptsRun the environment
docker compose up -d
This configuration mounts your local ./prompts folder into the
container. Every time you save a .prompt file, it is instantly
available for testing.
3. Building Your First Prompt
Create a file named explain.prompt in your prompts/ directory. Every dot-prompt file starts with an init block
that defines the "contract" for that prompt.
init do@major: 1@version: 1.0params:@level: enum[beginner, expert] = beginner@user_message: strend initcase @level dobeginner: Explain this simply: @user_messageexpert: Explain this with technical detail: @user_messageend @level
Why @?
In dot-prompt, @ always means variable. @level and @user_message are variables that you will pass from your application
at runtime.
4. Rendering Your Prompt
Now, let's call the API to see how the compiler resolves the branching. Open your terminal and run:
curl -X POST http://localhost:4041/api/render \
  -H "Content-Type: application/json" \
  -d '{
    "prompt": "explain",
    "runtime": {
      "level": "expert",
      "user_message": "What is an atom?"
    }
}'The output will be a clean string: "Explain this with technical detail: What is an atom?".
The LLM never saw the case block or the beginner branch. It only saw the resolved text.
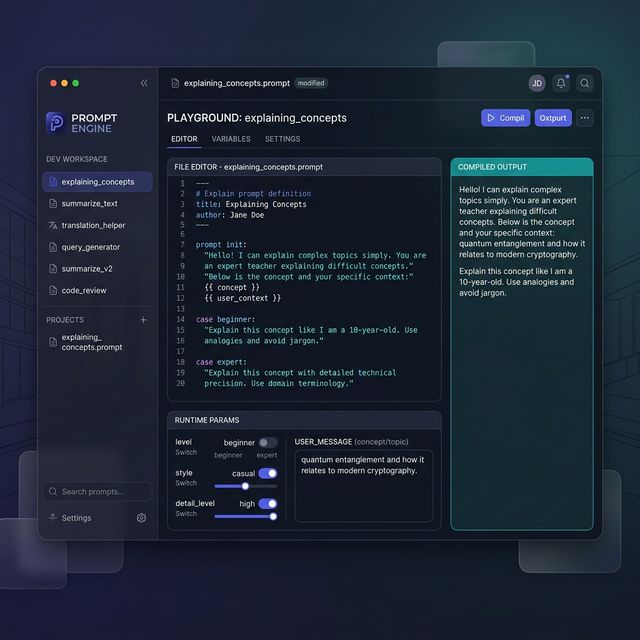
5. The Dev UI (The "Viewer")
Open http://localhost:4040 in your browser. You'll see a list
of your prompts. Click on explain and you'll get a real-time
playground where you can toggle your params and see the compiled output instantly.